Setting up a webhook
Before you start
All bots listen to Web1on1 events via a webhook. With a webhook you can tell Web1on1 to send one or more events from Web1on1 to your bot (the url your bot is connected listening on). There are to solutions to create a webhook:
- General webhook
- Bot specific webhook
Both of this solutions will be shown down below, but we recommend to use the bot specific webhooks. Also make sure you have a Web1on1 admin account.
Setting up a general webhook
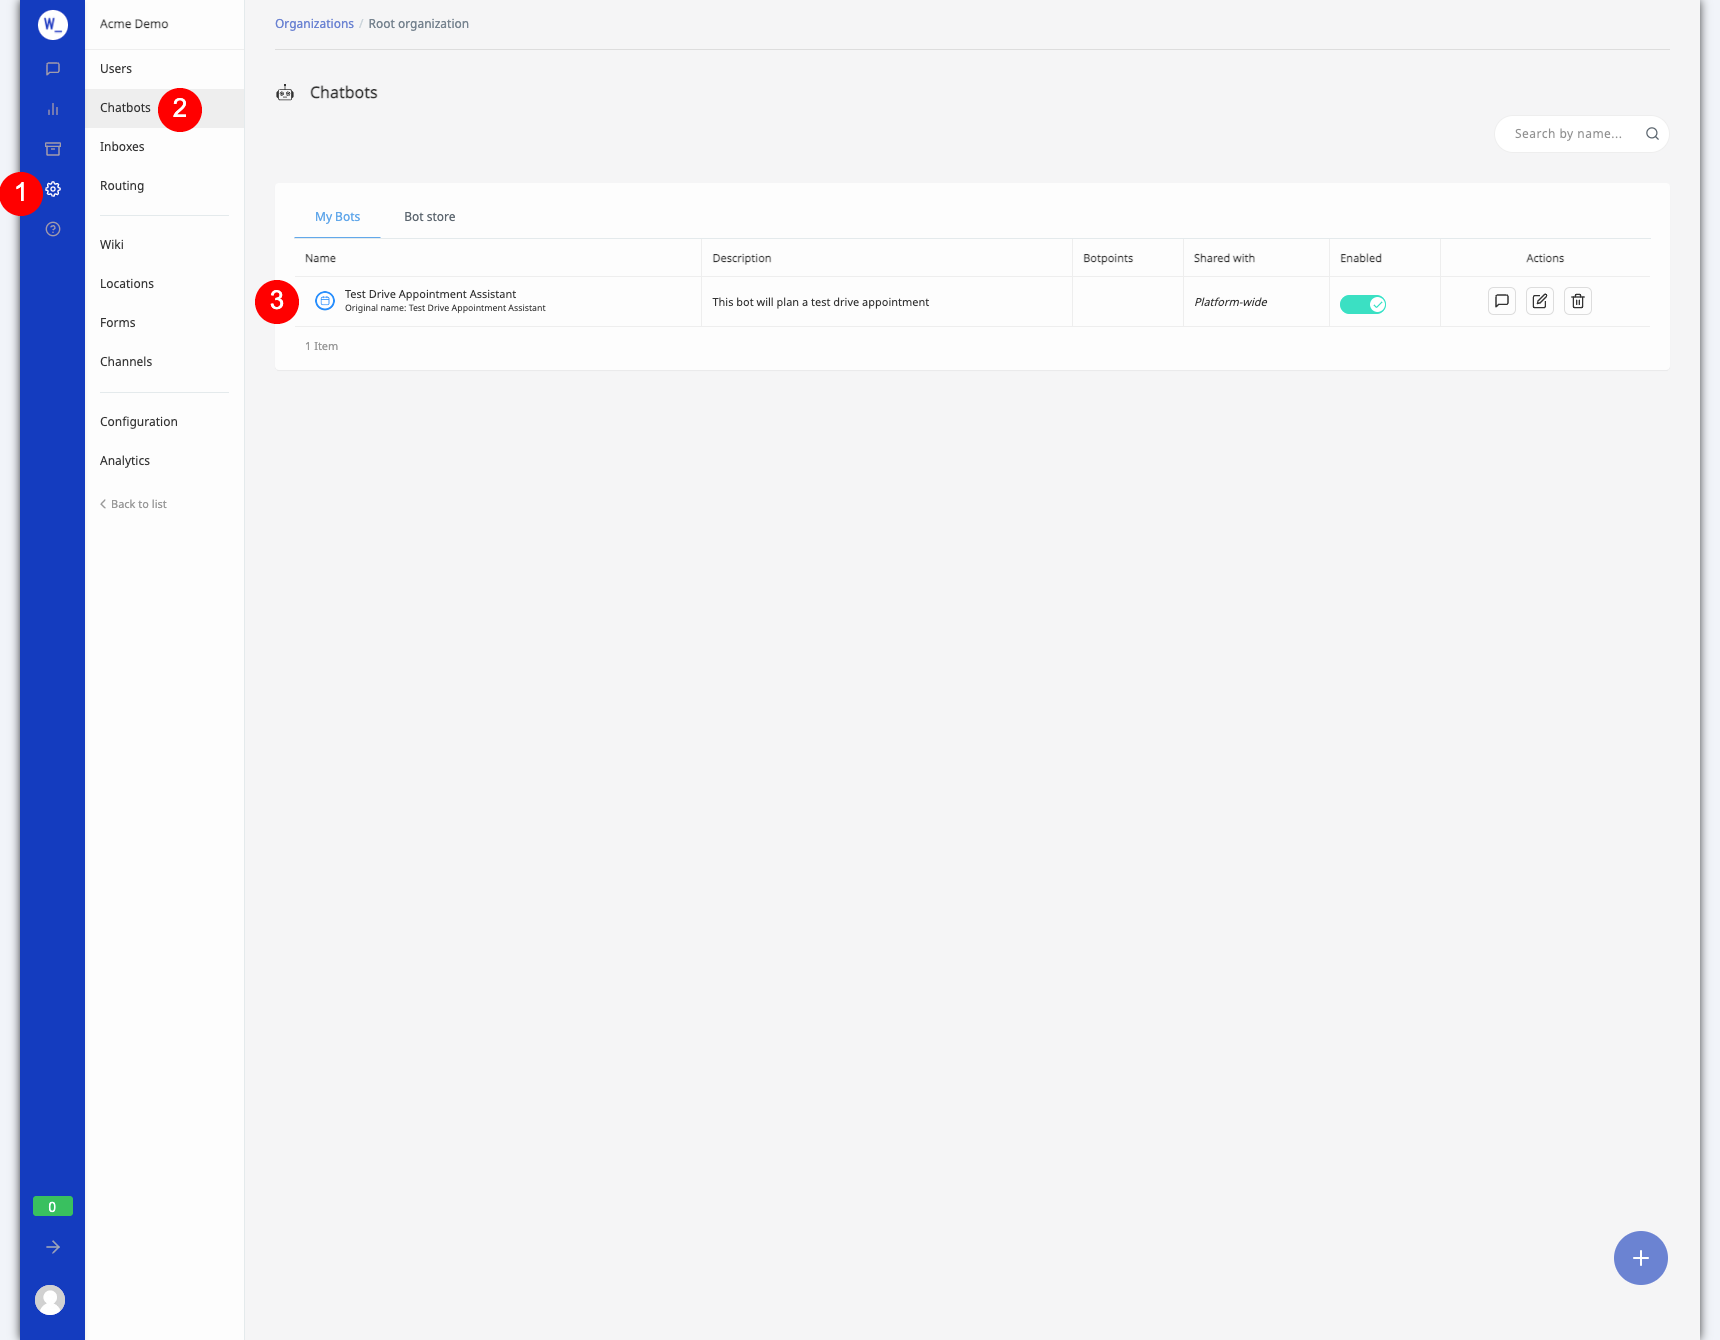
Let's create a new general webhook by following the click directions in the image below:

Adding a webhook to your organization. Webhooks are found by:
(1) Selecting Settings > <Your Organization>
(2) Selecting Channels sidebar
(3) Clicking on + on bottom right of page.
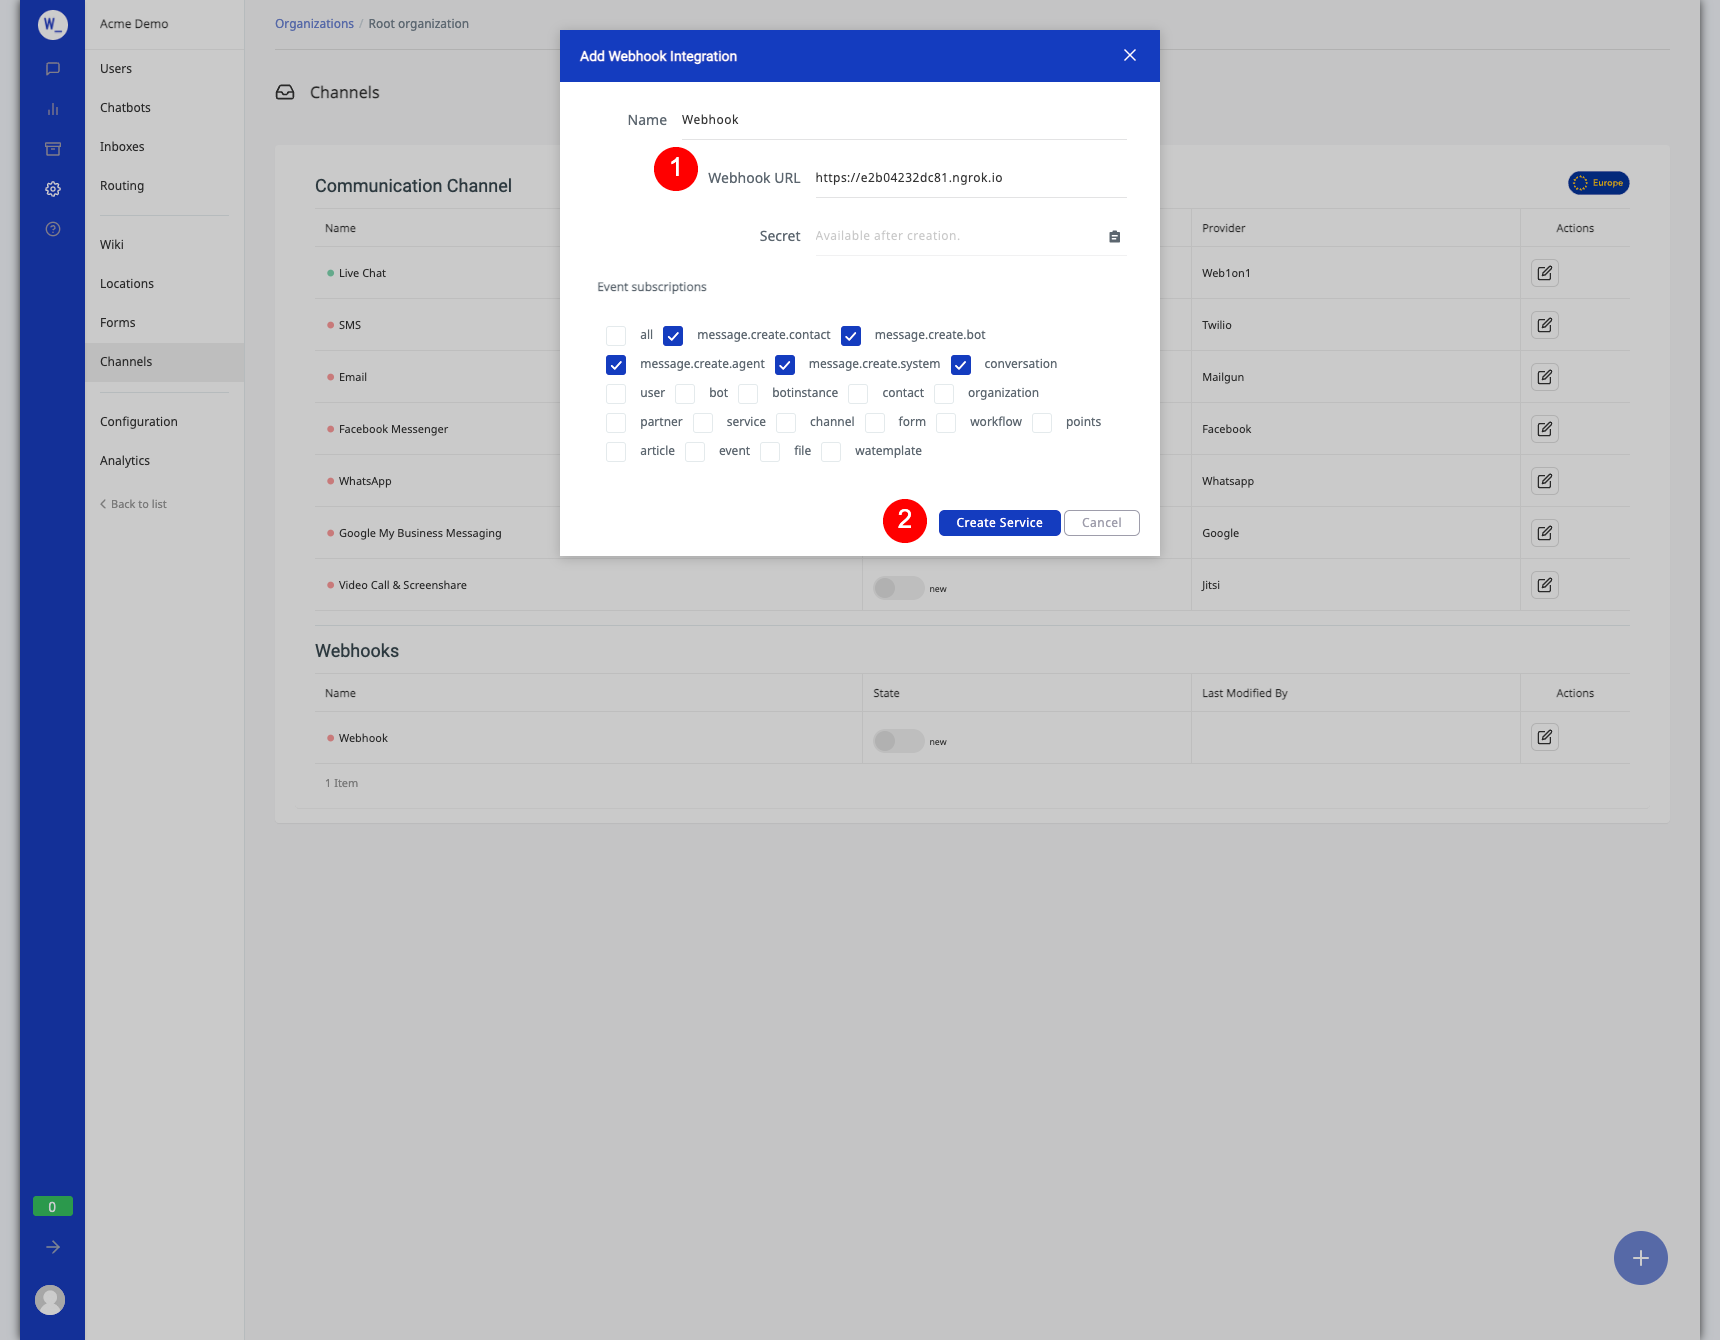
The webhook creation page will open. Configure it by following the directions in the image below:

(1) Fill in the Webhook URL (the ngrok https url from the previous chapter),
(2) Clicking on Create Service
When we created the webhook Web1on1 did a GET request on the webhook endpoint and expects it to return a 200 OK. And it did. But how, you might ask. The answer is the ChipChat SDK does this for us. It will create the GET endpoint for us and return the 200 OK for us.
actually it does a bit more, but that is outside the scope of this project
Setting up a bot specific webhook
Let's create a new bot specific webhook by following the click directions in the image below:

Adding a webhook to your organization. Webhooks are found by:
(1) Selecting Settings > <Your Organization>
(2) Selecting Bots sidebar
(3) Clicking on the bot or on the pencil-icon at the end of the row.

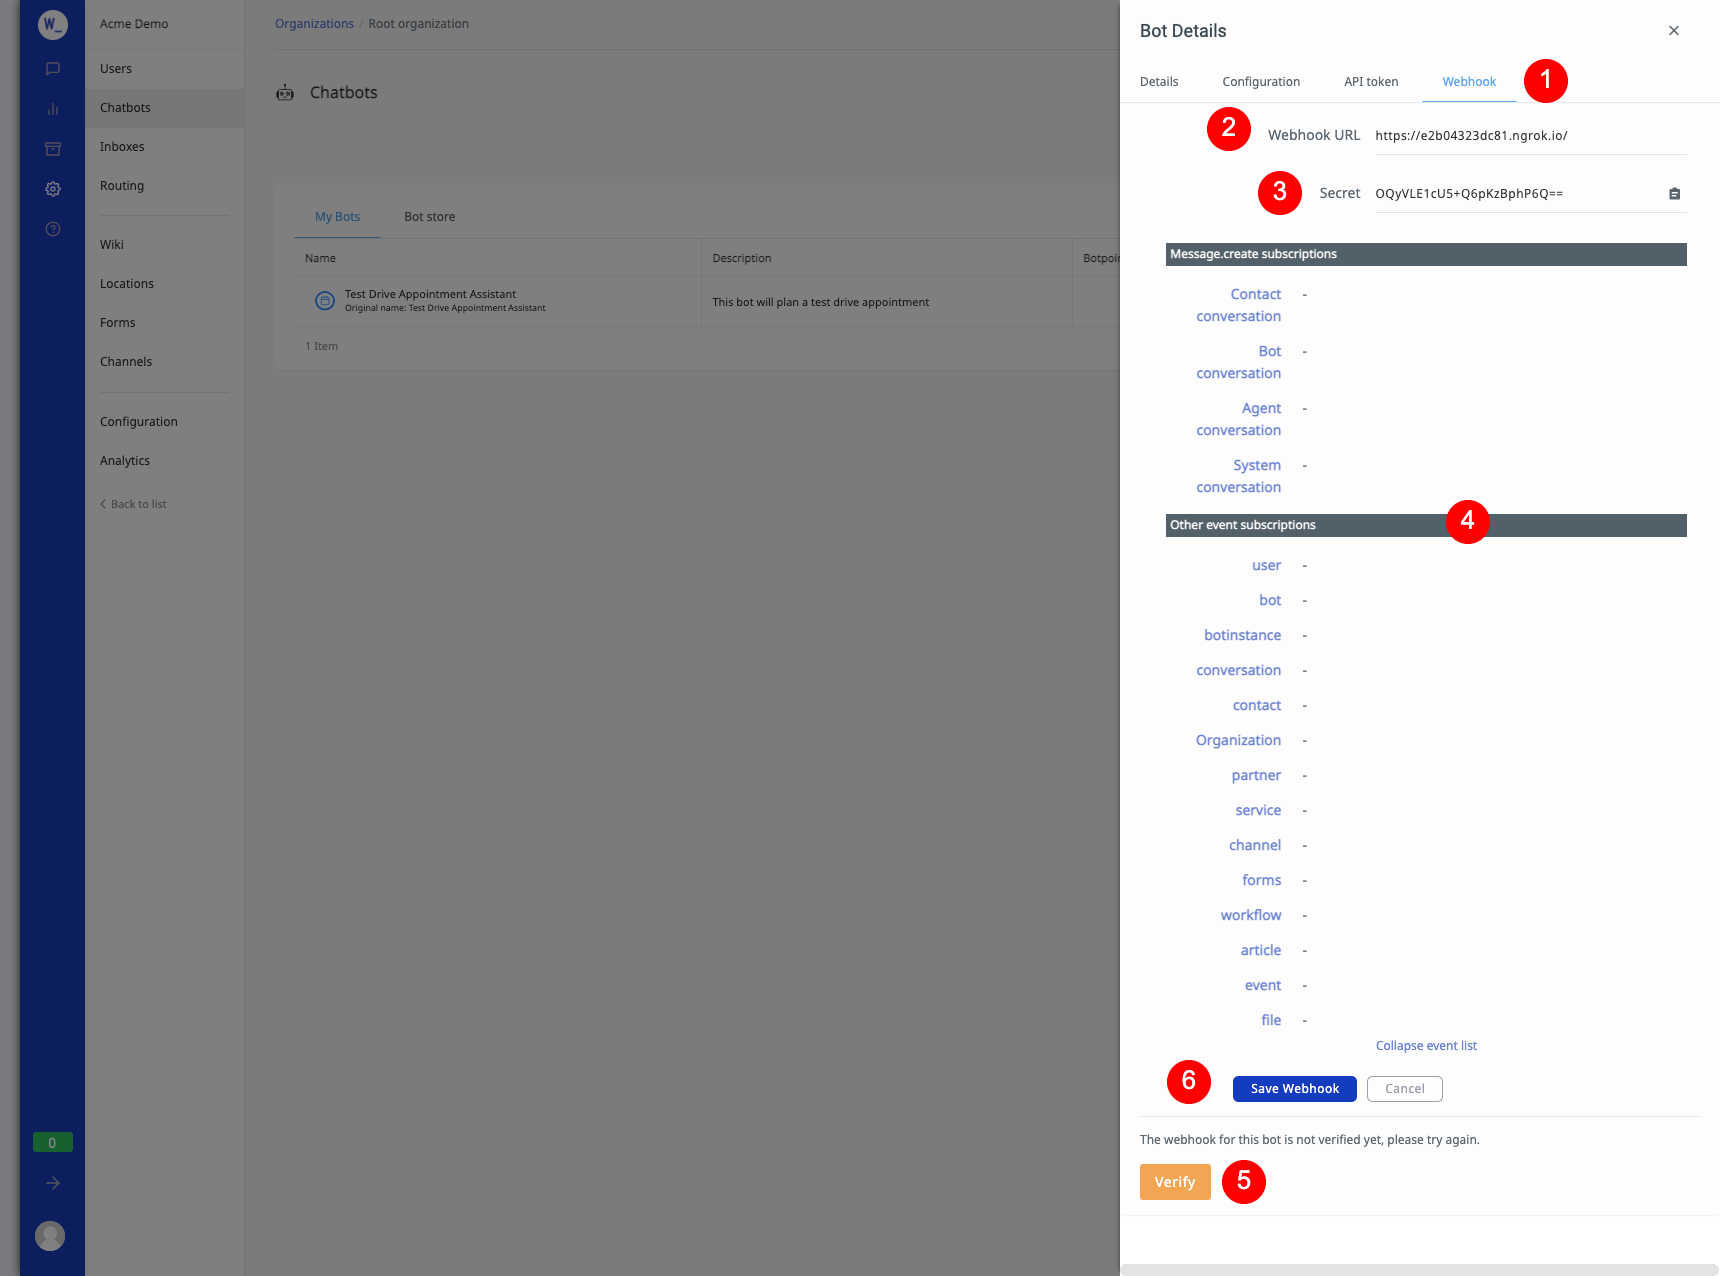
(1) Click on the tab Webhook
(2) Fill in the Webhook URL (the ngrok https url from the previous chapter),
(3) The Secret will be filled by the App after you saved the webhook
(4) Choose the events you prefer to be listened to by the bot
(5) Verify means your webhook isn't verified yet. Run the bot and ngrok locally, next click Verify
(6) Clicking on Save Webhook, this will also automatically verify the webhook (if possible)
Programmatically creating a Webhook using the API
In addition to the admin UI, you may configure a webhook through the API by creating a webhook type service, and specifying your callback url and optional secret and/or events in the params object:
Request: POST /v2/services
{
    "name": "MCC Webhook",
    "type": "webhook",
    "params": {
        "url": "https://hooker:z3kruT@example.com/cs-webhook",
        "secret": "zICWczLmAOEDvh1DiPGSHw==",
        "events": [
            "message.create.*"
        ]
    }
}
You are responsible for the security of the webhook endpoint. We suggest that you use HTTPS in combination with HTTP simple authentication. (e.g. https://username:password@domain.tld/path/to/webhook/)
An optional params.url.secret string may be provided for securing your callback URL; see below for details.
See the chapter on Services and Touchpoints in this guide for more information on this and other types of services.
