Common Scenarios
The widget is opened by the visitor, by clicking on the widget icon or a CTA button. By default, the widget also opens automatically after 30 seconds.
There are three ways the widget can start interacting with your site visitor:
- Capturing free-form input from visitor (greeting message when triggered on delay)
- Fill in a pre-chat form, for optimal routing to inboxes or bots
- A bot starts immediately
Disabling default options
Configuration options can be changed in the Advanced Config Editor. We will describe some use cases here and show the configuration for it.
For example, to disable the "Shoutout" (enabled by default) and activating the widget after 30 seconds, add the following in the advanced configuration editor:
{
    "shoutout": false,
    "openAfter": false
}
1. Free-form visitor input
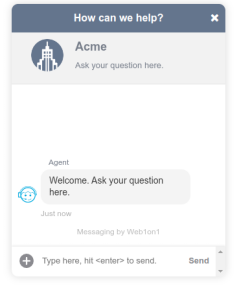
By default, the Live Chat widget is configured to have the consumer initiate the conversation. The widget is activated automatically after 30 seconds on the page, and shows a welcome message to invite the visitor to respond.
- openAfter: 30 seconds
- agentWelkomMessage: "Welcome. Ask your question here" (6 languages)
- No welcome message if visitor opens the widget him/herself
- scenarioBot: disabled
When the widget is activated automatically after a delay, a welcome message is shown to the visitor to engage in a conversation:

To instead auto-open after 15 seconds and change the default message, specify new openAfter and customText.agentWelkomMessage properties:
{
    "openAfter": 15,
    "customText": {
        "agentWelkomMessage": "Hallo! Hoe kunnen we je helpen?"
    }
}
The contact message gets routed to an inbox or bot through inbound routing rules, to notify inboxes or assign to a bot.
2. Prechat Capture Form
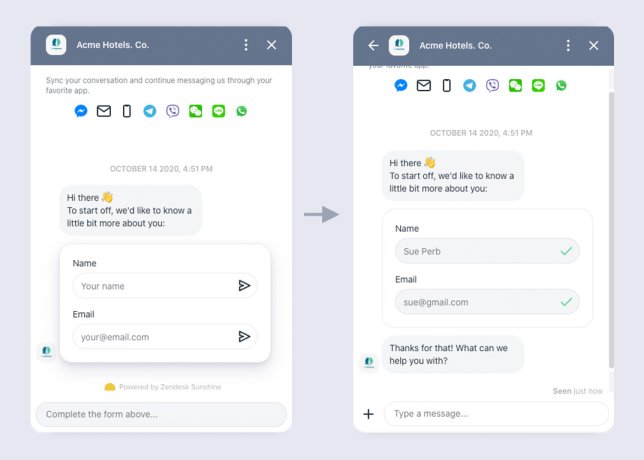
Prechat Capture is a widget add-on which leverages the new form message type and allows you to capture profile fields like a user’s name, email and category before the start of a conversation.

When enabled, the chat input is disabled and the user is greeted by a welcome message and a form asking for their name and email. Once the form is successfully submitted, a thank you message is sent to the user and the conversation is then initialized, connecting the user to your business.
The form response values are interpreted for routing purposes. It can be used to:
- set a category and trigger routing rules
- notify a team inbox
- assign to a bot
You can customize the prechat capture form in your form listing. See the Prechat Capture chapter for more details.
3. Starting bots
Start a bot when the widget is activated
To start a bot when the widget is activated, call the sendClientMessage function when the widget:opened even is triggered. It takes the command prefix '>cs' followed by a Bot ID.
 window.web1on1.on('widget:opened', function() {
    web1on1.api.sendClientMessage(`>cs 6050966f00c6e002dc2fbb6e`);
 });
This code is typically called from an onload handler; see the full example for more information.
Start a bot from a Call-to-Action button
You can use a CTA button to activate the widget and start a bot. If you need to also trigger that same bot when the widget is activated by the website visitor, use the same method as above:
 window.web1on1.on('widget:opened', function() {
    web1on1.api.sendClientMessage(`>cs 6050966f00c6e002dc2fbb6e`);
 });
Next, add a button to the web page. The bot assignment will take place through the window:opened event handler, so when including a button in your web page, make sure it only activates the widget. Use the data-web1on1-open attribute to do that:
<button data-web1on1-open="">Start bot</button>This will make sure the bot is only assigned once, by solely using the sendClientMessage described above.
Multiple CTA buttons targeting different bots
When the web page contains several bot action buttons, the sendClientMessage in the widget:opened event handler can not be used. In this case, the bot ID has to be set in the button itself.
Adding the data-web1on1-bot="BOTID" attribute to any dom element on the website where the widget is active, will open the widget and start that particular bot. The following code will start the "Contact Me" bot (the bot ID can be found in the bot's details panel):
<button data-web1on1-bot="6050966f00c6e002dc2fbb6e">Start bot</button>Clicking this button will activate the widget and start the "Contact Me" bot. Important: the bot you're referencing needs to be enabled for your organization.
